
Intake fan on your XBox.
Page 1 of 1

Intake fan on your XBox.
![]() by Corp Dwayne Hicks Thu Mar 31, 2016 8:17 pm
by Corp Dwayne Hicks Thu Mar 31, 2016 8:17 pm

I run a soft modded box, and when using XBMC, it gets quite hot. Running the fan at 100% is very noisy, This is my solution to the cooling problem - An intake fan!
I haven't seen any how to's for this and I have been through many sites for Xbox mods. So I have decided to do one of my own.
I will be assuming that you know how to open your Xbox, and remove the mainboard from the case.
This will show you how to do it yourself and keep your Xbox quiet and cool.
WARNING!
Opening your Xbox console voids the Factory Warranty! (Not at this point there is any left )
I assume no responsibility for any damages or harm that may come to you, your Xbox console, or any other persons or material items caused by the following of this
Do this at your own risk!
Step 1: Supplies...
You will need the following items to do this.
• 1, 3-Pin Case Fan (No larger than 40mm x 80mm x 10mm)
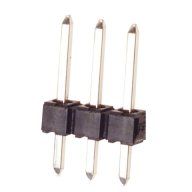
• 1, 3-Pin Header (see photo)
• Needle Nose Pliers
• Soldering Iron (15-30 watt Range)
• Rosin or Resin core 60/40 Solder
• Solder Wick/ Solder Sucker (Optional)
• Wire snips
• Torx Screwdrivers (T20,and T10 Respectively)
• Utility Knife/Craft Knife
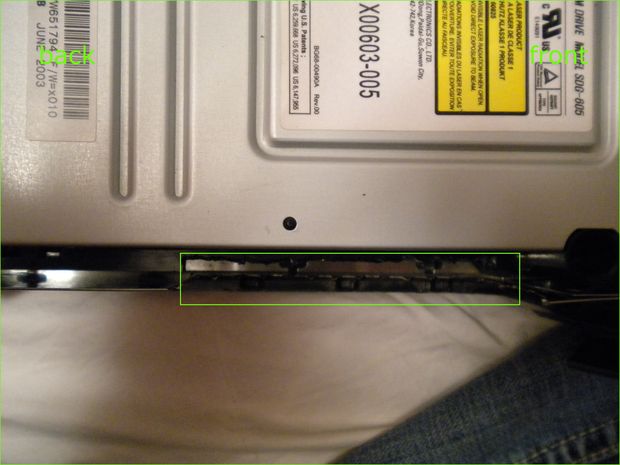
Step 2: ...Installing the pins...

Be very careful so you don't damage your mainboard!
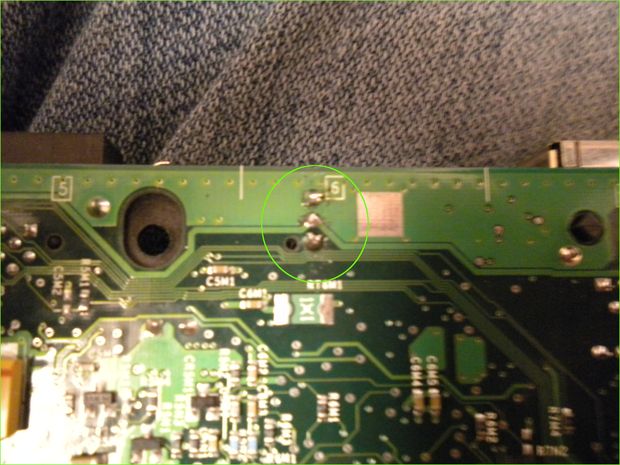
Turn your mainboard over, and find the pin out holes shown(photo 2). Mine were pre-tinned and so I had to heat the solder to get the pin header through the holes.
If you have solder wick or a solder sucker, proceed to remove the solder from the pin holes. and start soldering the pins in.
If not find something to hold the mainboard (safely), Vertical is best so you can see both sides of the board while you work.
After you have it secured, grab your pin header with a pair of pliers and position it so you can push it through while heating the solder at the same time. This is where some patience will pay off.
Put a bit of fresh solder on each pin joint to make sure you have a good sturdy connection!
When you're finished, put the mainboard back in and reconnect all the wires.
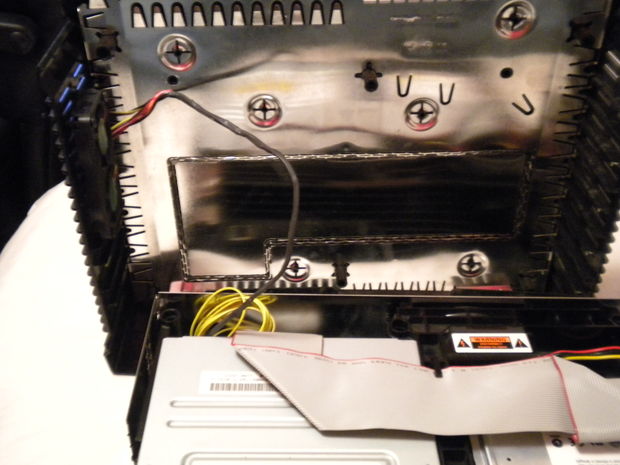
Step 3: ...Modifying the case...
This step is to allow room for the fan inside the case.
Here is where your wire snips and utility knife will come in use!
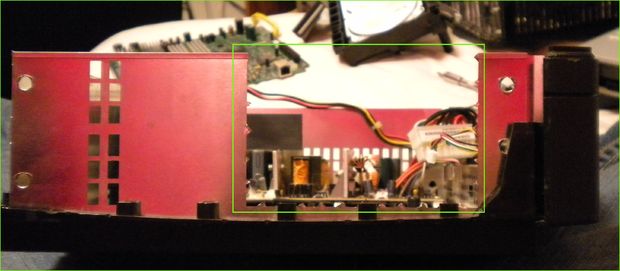
You will need to remove the tin from the area shown by snipping out the thin pieces and removing the vent piece.
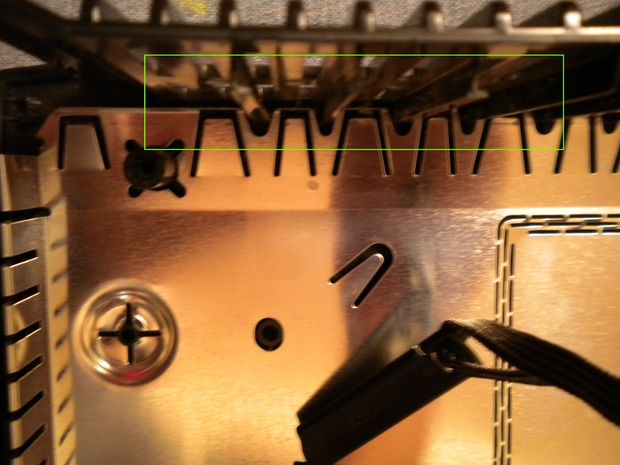
Also, you will need to remove plastic from the inside of the top case, there are raised bits of the vents on the inside of the case. (Photo 2)
Remove the first 5 of these from the left side of the case (front to back). This can be done easily with the wire snips. Once you have them roughly removed you can bring in your utility knife to clean it up a bit.
Last step is to remove the lip from the left side of DVD tray. (Photo 3)
Once you have all this done you can install your fan.
Step 4: ...Installing the fan...
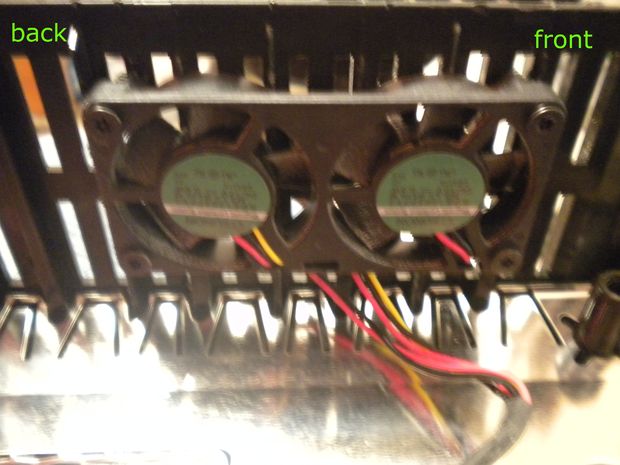
This is the easiest step, 4 screws and you're done!
I chose to use a Sunon MagLev Dual 40MM Case Fan KDE1204PFV2 because I happened to have it lying around...
Align your fan with the part of the case where you removed the plastic from the inside, put it up against the 6th piece of plastic which you did not remove. Stickers facing inwards.
Align the screw holes with the vents to make things simple just put the screws into the vent holes, or if you're feeling ambitious you can drill your own
Step 5: ...Put it all Back...

Reinstall your hard drive tray, dvd tray and reconnect all the cables.
Once you have finished, connect your fan to your new fan header, run the wire along side the dvd tray and put the top back on. (The top should go back on smoothly no forcing.)
Reconnect to your Television and make sure everything still works! (Photo 2)
Enjoy your new quiet Xbox!

Corp Dwayne Hicks- Admin
- Posts : 74
Reputation : 0
Join date : 2016-03-12
Location : London -

» Things You Must Know About The Xbox:
» XBOX 2TB SATA Upgrade Tutorial
» XBOX error codes
» Determine Version of Xbox
» Xbox Softmod Kit Tutorial
» XBOX 2TB SATA Upgrade Tutorial
» XBOX error codes
» Determine Version of Xbox
» Xbox Softmod Kit Tutorial
Page 1 of 1
Permissions in this forum:
You cannot reply to topics in this forum|
|
|